There are some steps that need to be taken in order to publish a React Native app to the iOS App Store. But first you need to know how to submit a native app to the app store. That is out of scope for this tutorial since there is a tutorial at Ray Wenderlich that covers that whole process. It helps you with setting up a developer account, create certificates and profiles and so on. After finishing those steps you can continue reading below.
1. Remove localhost from info.plist
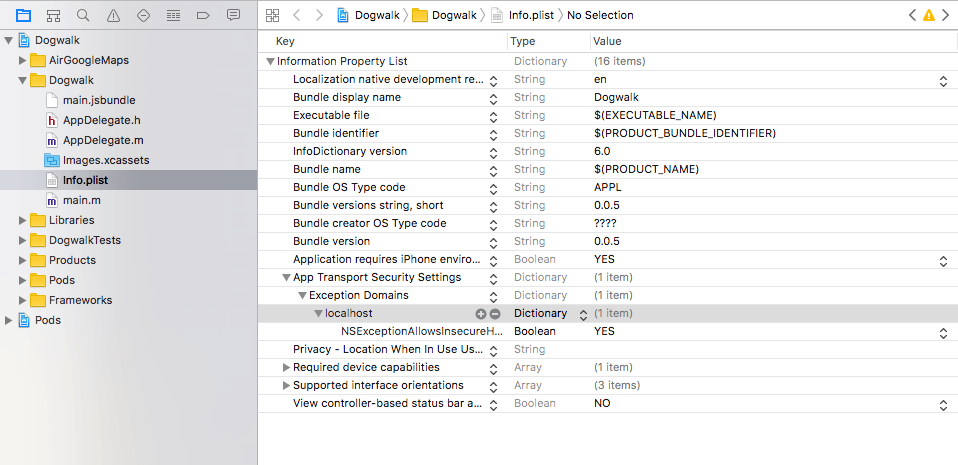
First we need to remove the localhost exception from info.plist. By default all traffic over HTTP is rejected since iOS 9 with App Transport Security. React Native has added an exception to localhost to make development easier.
Open info.plist and expand the App Transport Security settings and Exception Domains. Under there you’ll find the localhost entry. Remove it.
2. Create a release scheme
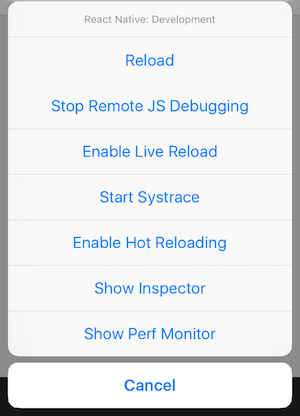
When building an app for release the React Native Developer Menu will be disabled.
The Javascript files we’ve created for our app will be bundled and put locally in the app so we can test it without being connected to a computer.
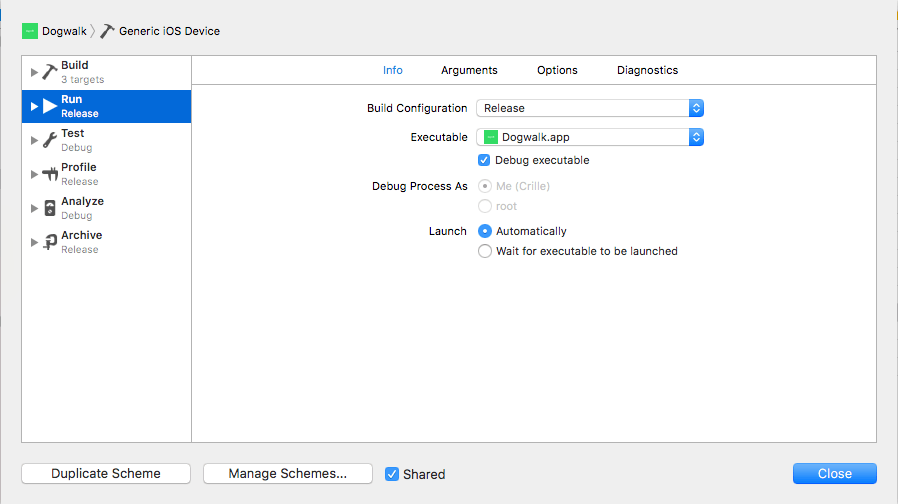
Go to Product -> Scheme -> Edit Scheme in XCode. Select Run tab and set the Build Configuration dropdown to Release.
3. Build app with release scheme
Select Product -> Build from XCode or build the app from the command line using this command:
react-native run-ios --configuration Release4. Documentation
To get to know more about this you can take a look at the React Native Documentation
Off topic on React native google maps
If you are using React native google maps in your app you might run in to problems when building an archive to publish on the app store.
I got an error “duplicate symbols for architecture…” and a friendly Github:er called se1exin posted a solution to the problem.


